
Learning how to draw a nose is one of the most important skills in face drawing because the nose sits at the center of the face and plays a major role in defining expression, realism, and character. Many beginners struggle with drawing noses because they focus too much on outlines rather than understanding form, structure, and light. The truth is that noses are not flat shapes; they are three-dimensional forms made of planes, curves, and subtle shadows. Once you understand this, drawing a nose becomes far easier and more natural. This guide will walk you through everything you need to know, from basic shapes to realistic shading, helping you confidently draw noses from any angle.
Understanding the Basic Structure of the Nose
Before putting pencil to paper, it is essential to understand the basic structure of the nose. A nose can be simplified into three main parts: the bridge, the tip, and the nostrils. Instead of thinking about lines, think in terms of volumes. The bridge acts like a slanted plane coming down from the forehead, while the tip is a rounded form that catches the most light. The nostrils sit slightly underneath the tip and curve inward, creating shadows rather than harsh outlines. When you visualize the nose as a 3D form rather than a symbol, your drawings immediately look more realistic and proportional.
How to Draw a Nose Using Simple Shapes
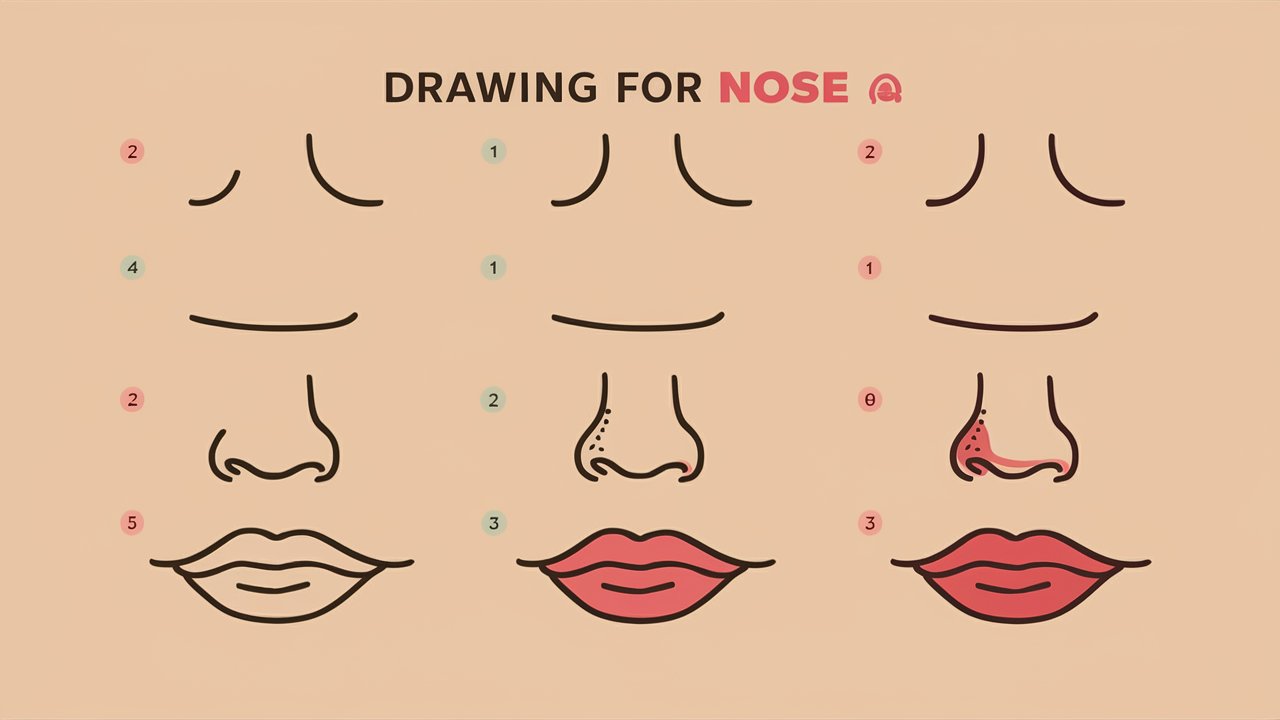
One of the easiest ways to learn how to draw a nose is by starting with simple shapes. Begin with a circle or oval to represent the tip of the nose. From there, lightly sketch a vertical rectangle or trapezoid above it to indicate the bridge. On each side of the circle, add small curved shapes to represent the nostrils. These shapes act as a framework, helping you place each part correctly without overthinking details. Once the structure is in place, you can refine the lines, soften edges, and remove unnecessary guides, allowing the nose to emerge naturally.
Drawing the Nose with Proper Proportions
Proportion is critical when learning how to draw a nose realistically. The width of the nose is usually aligned with the inner corners of the eyes, while the bottom of the nose generally sits about halfway between the eyes and the chin. Paying attention to these relationships keeps the nose from looking too large, too small, or misplaced. Instead of guessing, compare distances visually and adjust as needed. This habit will significantly improve your accuracy and consistency in face drawing.
How to Draw a Nose from Different Angles
Drawing a nose from the front is only the beginning. To truly master how to draw a nose, you must practice different angles such as side view, three-quarter view, and looking up or down. From the side, the bridge creates a clear profile, and the nostril becomes more visible as an opening rather than a line. In a three-quarter view, one nostril appears larger due to perspective, while the far side is partially hidden. Understanding how perspective affects shape will help your drawings feel more dynamic and realistic instead of stiff or flat.
Adding Shading for a Realistic Nose
Shading is what transforms a simple sketch into a realistic nose. Light usually hits the bridge and tip first, leaving the sides and underside in shadow. Avoid drawing heavy outlines around the nose; instead, use gradual shading to define form. Soft transitions between light and shadow create a natural look, while harsh lines can make the nose appear cartoonish. By observing real faces or reference photos, you can train your eye to notice subtle tonal changes that bring depth and realism to your artwork.
Common Mistakes to Avoid When Drawing a Nose
Many beginners make the mistake of drawing nostrils as dark holes or outlining the entire nose with thick lines. Another common error is ignoring symmetry or exaggerating the size of the tip. Remember that noses vary widely in shape, and realism comes from observation, not assumptions. Keeping your lines light and flexible allows you to correct mistakes easily and improve faster.
Conclusion
Learning how to draw a nose takes patience, observation, and consistent practice, but it does not have to be complicated. By understanding the basic structure, using simple shapes, maintaining proper proportions, and applying soft shading, anyone can draw a convincing nose. Whether you are sketching faces for fun or working toward realistic portrait art, mastering nose drawing will dramatically improve your overall results. Practice regularly, study real references, and don’t be afraid to experiment—every sketch brings you one step closer to mastery.
Frequently Asked Questions (FAQ)
How long does it take to learn how to draw a nose?
The time varies depending on practice, but most beginners see improvement within a few weeks of consistent drawing and observation.
What is the easiest way to draw a nose for beginners?
The easiest method is using simple shapes like circles and rectangles to build the structure before adding details and shading.
Should I outline the nose when drawing?
No, outlines should be minimal. Shading and soft edges create a more realistic appearance than heavy lines.
How can I make my nose drawings look more realistic?
Focus on light and shadow instead of lines, study real references, and practice drawing noses from different angles.
Can I draw a nose without shading?
Yes, but shading adds depth and realism. Without shading, the nose may look flat or stylized.